So you know the 10 things to be dangerous in OpenSCAD, and now you have the power to easily 3D model in your hands! However, for all but the simplest of shapes, OpenSCAD code can quickly become a tangled mess of symbols, curly braces, and numbers.
Missed out on previous OpenSCAD tutorials? See what I’ve written previously on OpenSCAD.
But organizing? Psha! Who has time for organizing? Actually, learning how to organize your code will help you make more complicated shapes and assemblies, while being productive. I’ll introduce a few hard-won principles programmers in other languages have learned over the years. Interspersed with the principles, we’ll go over actual OpenSCAD statements to teach you how to organize your code.
It’s harder to read code than to write it.
Early on in your project, you start writing a flurry of code to model your part, and you’re really productive! But then no matter how smart you are, there’s only so much you can fit in your head at once. Pretty soon, you’re confused as to which part of the code produces which part of the model. And it seems like changing one part has cascading changes to the rest of the assembly.
And it’s even worse when you come back a couple weeks later to look at your code. You can’t remember where you put the origin, what order the parameters are in, or why you modeled things that way.
So always write code to be easier for the maintainer, because chances are, that person will be you in the future. And you will hate yourself if you don’t!
Using modules to reuse code
One way to organize your code is to make reusable components. Not only will we save on typing and cutting and pasting, but more importantly, we will have a single implementation in one place. So if we need to change something, we only need to change it in one place, and not hunt for all the copies of something.
Let’s say we want to make a ring. We can do this by subtracting a cylinder from another cylinder.
difference() {
  cylinder(h = 2, r = 10);
  translate([0, 0, -1])
    cylinder(h = 4, r = 8);
}
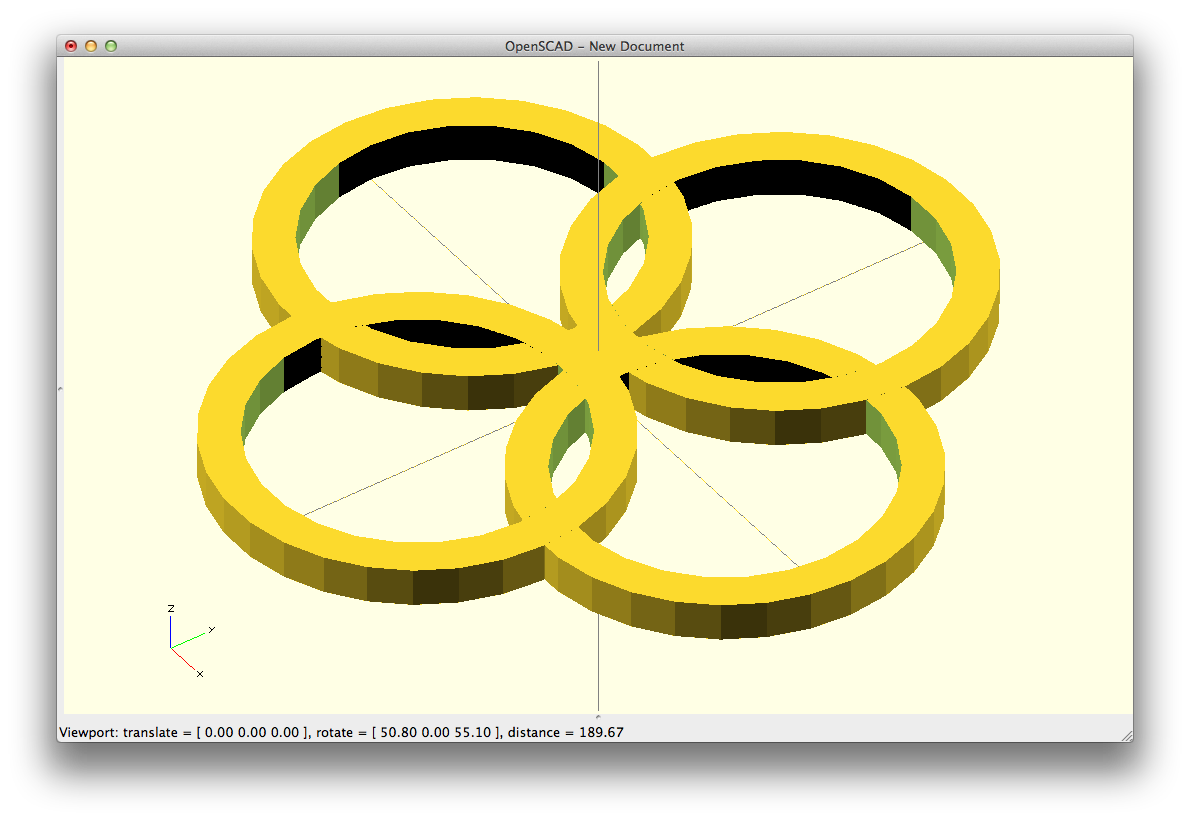
But what if we want to make a clover patterned cup coaster from multiple rings? Well, we can translate the ring in different directions and get:
translate([10, 0, 0])
  difference() {
    cylinder(h = 2, r = 10);
    translate([0, 0, -1])
      cylinder(h = 4, r = 8);
  }
translate([-10, 0, 0])
  difference() {
    cylinder(h = 2, r = 10);
    translate([0, 0, -1])
      cylinder(h = 4, r = 8);
  }
translate([0, 10, 0])
  difference() {
    cylinder(h = 2, r = 10);
    translate([0, 0, -1])
      cylinder(h = 4, r = 8);
  }
translate([0, -10, 0])
  difference() {
    cylinder(h = 2, r = 10);
    translate([0, 0, -1])
      cylinder(h = 4, r = 8);
  }
While it works, the code is terrible. If we then decided we wanted rings of a different height, we’d have to change it in four different places. Let’s make the ring a reusable component with the module() statement:
module ring() {
  difference() {
    cylinder(h = 2, r = 10);
    translate([0, 0, -1])
      cylinder(h = 4, r = 8);
  }
}
Now we can reuse the ring component for our clover coaster:
translate([10, 0, 0]) ring();
translate([-10, 0, 0]) ring();
translate([0, 10, 0]) ring();
translate([0, -10, 0]) ring();
Much better! But what if we want to use this over and over again in difference sizes? It’s not as reusable if we can’t parameterize the ring() module for rings of different sizes.
Parameterized modules can help make code reusable
Currently, our ring() module can only generate one kind of ring. To leverage the power of modules, we should parameterize our ring module so we can make different rings of different sizes.
What aspects of our module should be parameterized? It’s situation dependent, but usually it’s aspects of the module that a user might want to change. Our first guess may be that it’s the height of the ring (height), the inner radius (inner_radius), and outer radius (outer_radius).
module ring(height, inner_radius, outer_radius) {
  difference() {
    cylinder(h = height, r = outer_radius);
    translate([0, 0, -1])
      cylinder(h = height + 2, r = inner_radius);
  }
}
Notice that we chose the parameters according to how it was constructed. This is as bad of an idea as ice cream on pizza!
When we have parameterized modules, we want to make it easy to use, to encourage reusability. Hence, we want to hide how a module does its work or constructs the shape, because a module is easier to use if we can tell it what to do without knowing how it does it. As a result, we shouldn’t have to provide parameters for a module that requires us to know how a shape was constructed.
A more natural way to think about a ring would be to change the radius from the center to middle of the ring (radius), the radial thickness of the ring (radial_width), and the vertical thickness of the ring (height). In that case, our module would be:
module ring(height, radius, radial_width) {
  difference() {
    cylinder(h = height, r = radius + radial_width / 2);
    translate([0, 0, -1])
      cylinder(h = height + 2, r = radius - radial_width / 2);
  }
}
This is more apparent the more complicated shape a module produces. Remember to make the parameters of a module so that when you’re using it, you don’t have to look into how a module is implemented in order to figure out how to use it! That leads us to our next principle.
Keep interfaces steady, and hide implementation details
When you don’t need to look into how a module does something in order to ask it to do that thing will free your mind to think about the other things that need to be done. That will speed up your development and make the module fun and a breeze to use.
Going back to the ring module, it shouldn’t matter if I used a difference of cylinders or a rotational extrusion to make the ring. The following two modules produce exactly the same shape with the same interface:
// ring implemented with cylinders module ring(height, radius, radial_width) { difference() { cylinder(h = height, r = radius + radial_width / 2); translate([0, 0, -1]) cylinder(h = height + 2, r = radius - radial_width / 2); } }// ring implemented with rotational extrusion module ring(height, radius, radial_width) { rotate_extrude() translate([radius, 0, 0]) square([radial_width, height]); }
As a user of the module, we shouldn’t care how it was implemented, we should care that the interface isn’t subject to change. In the future, let’s say we find that one way of generating the ring is faster than another. When we have a stable interface, we can change the implementation without cascading changes to the rest of the code that uses the ring module.
Use succinct descriptive module names
There are other things one can do to make modules easier to reuse. The modules themselves should have names that make sense–that are both descriptive, yet succinct.
module ring2()doesn’t tell me anything about what it does other than it’s not ring(). But if it was named:
module ring_rounded()Then I can at least tell it’s a rounded ring (which by the way is called a torus).
Principle of Least Astonishment: Be consistent in your interfaces
Part of making modules easy to use is to have consistent interfaces. The more consistent your interfaces for your module are, the less you’ll have to keep in your head. So if earlier, we used the interface:
module ring(height, radial_width, radius)when we write ring_rounded, we should use the same names in the same order
module ring_rounded(height, radial_width, radius)That way, when we use ring_rounded, we’re not wondering…does the height go first? Or does the radial width? The less we have to worry about those types of details, the better.
Of course, it’s all a matter of degree. Based on this, we can argue that we should also be consistent with OpenSCAD’s core cylinder’s conventions, so our module interface should be:
module ring(h, rw, r)However, that’s a balance between consistency and readability. That’s something for you to decide.
Code reuse leads to abstractions
When we have code we can reuse, we have modules we can tell them what to do without knowing how they do it. That’s what’s called an abstraction. Abstractions free up our mind to focus on higher level details, instead of worrying about the lower level details. It’s the difference between thinking that “I want to bevel this edge” (high level), versus “I want to create the negative image of a bevel that I can subtract against an edge”.
Abstractions lets us think at a higher level, so we don’t have to think about the details. When we don’t have to think about all the details, we can keep more of the code in our heads when we’re working on it.
Let me know that you find these helpful by signing up for my mailing list to get more OpenSCAD guides as I write them. It’ll incentivise me to write more! See what I’ve written previously on OpenSCAD. If you’d like to see what else I work on, check out Cubehero, or follow me on twitter.

[…] via Hacker News http://blog.cubehero.com/2013/12/18/organizing-your-openscad-code-part-i/ […]
Hello, you have done a remarkable job. Having a code well organized it is like having a language well articulated. I support your commitment and I encourage you to continue in this way. Thank you.
Thanks! Let me know if there are other guides you’d like to see.
[…] time, we looked at how to organize your OpenSCAD code. This time, we’ll get a little bit more advanced. We’re going to make cookie cutters! And in […]
Great writeup! I learned a lot. Found a little mistake which might confuse readers: “Let’s say we want to make a ring. We can do this by subtracting a cylinder from another ring *cylinder*.”
Thanks for the bug report. Fixed!
This article is exactly what I needed. I had assumed modules were for big collections of components. In reality they are what a function would be any other language andshould be used for everything! I also just discovered you can nest modules, with the inner module being able to read variables of the outer one, which I found useful for code organisation.
Looking forward to working my way through your other posts.